Factory DCS System PLC Acquisition & Large-Screen Kanban Case
Factory DCS System PLC Acquisition and Large-Screen Kanban Case
1. Project Background
A factory in Zhengzhou needed to acquire specified data from production-line and environmental-instrument PLC equipment and build a software system for display. Wi-Fi was available on site, and wireless transmission was used for the hardware acquisition devices.
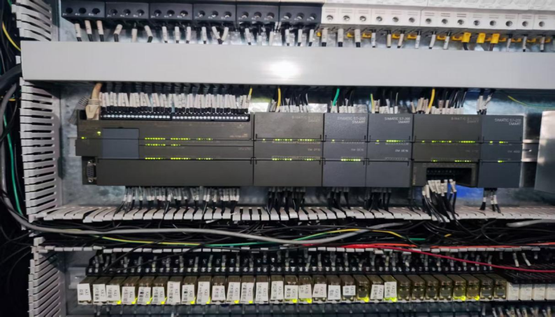
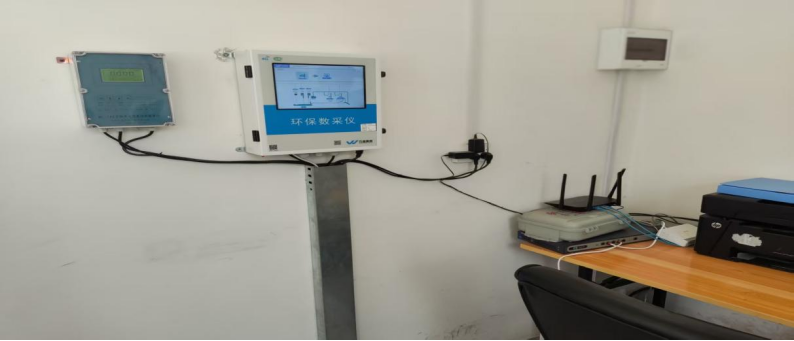
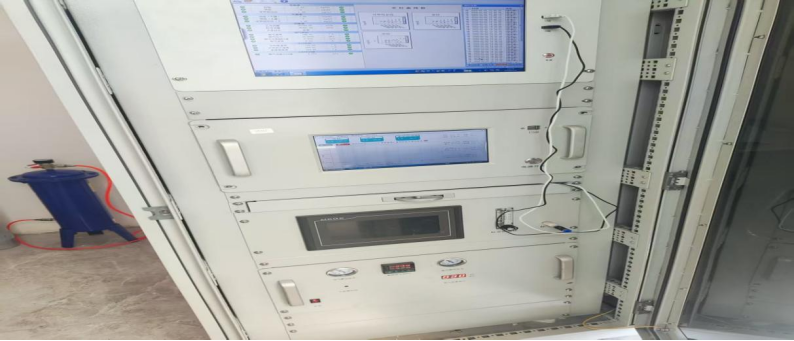
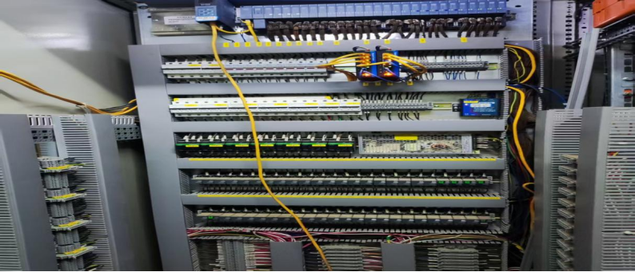
Production-line and environmental-instrument equipment
2. Technical Solution
Because the customer site has Wi-Fi and the PLC brand communication protocol documents were provided, this project uses our Wi-Fi PLC acquisition gateway, storing acquired data in a PostgreSQL database. Software development can then directly obtain the real data from the database, ensuring the accuracy of logic processing during development.
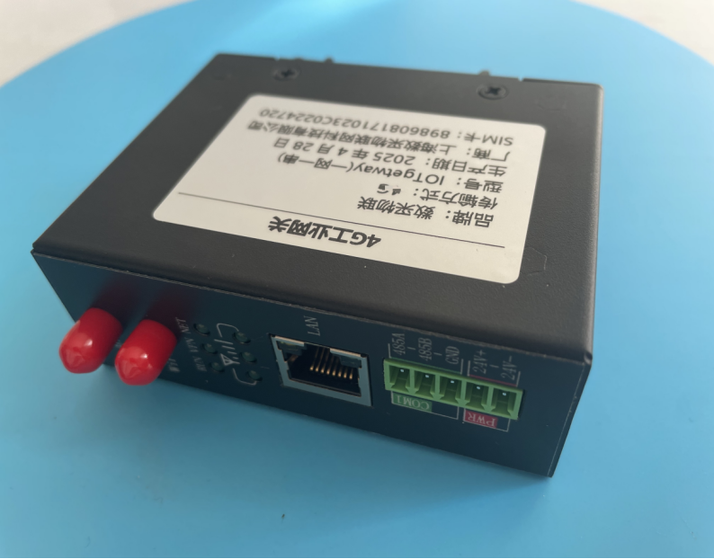
Wi-Fi PLC acquisition gateway
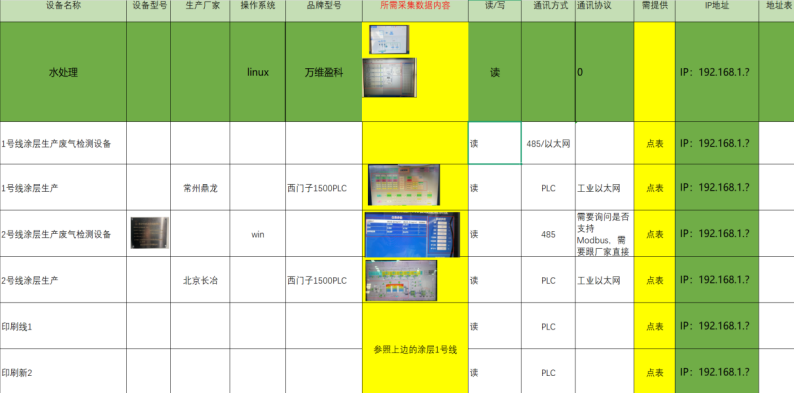
List of PLC devices to be acquired
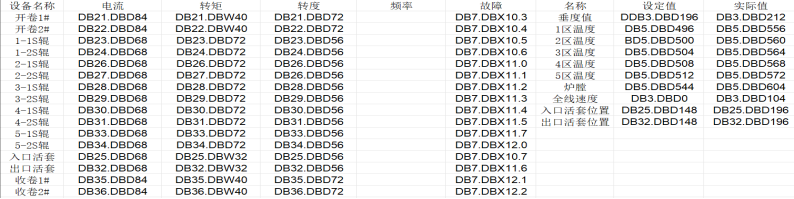
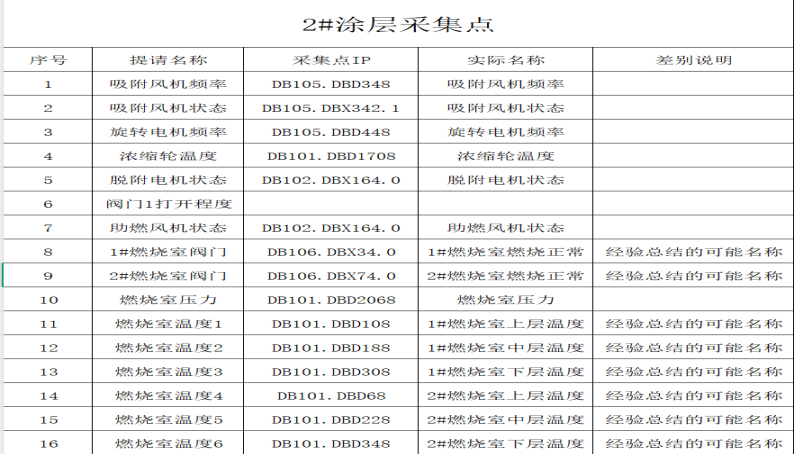
Partial PLC communication point table
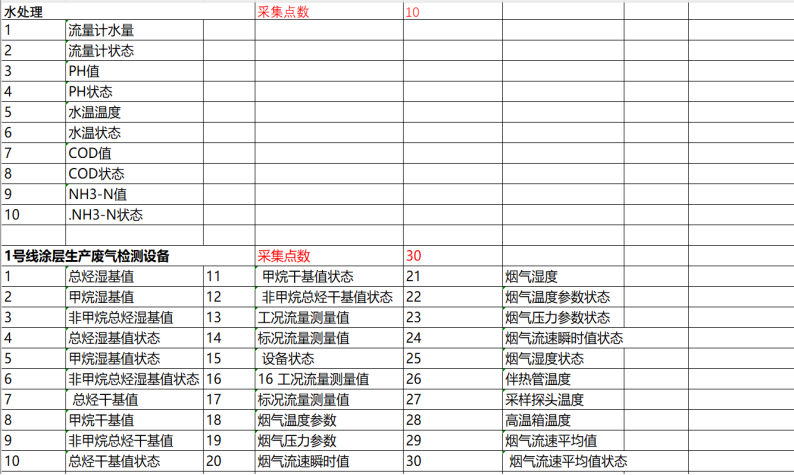
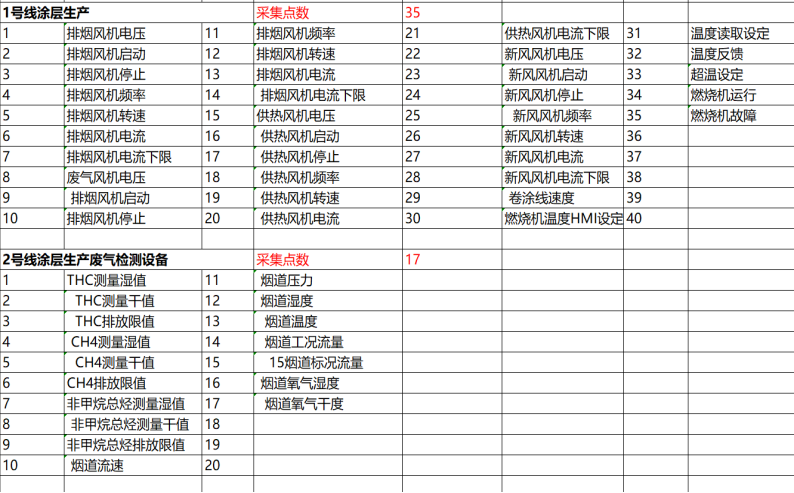
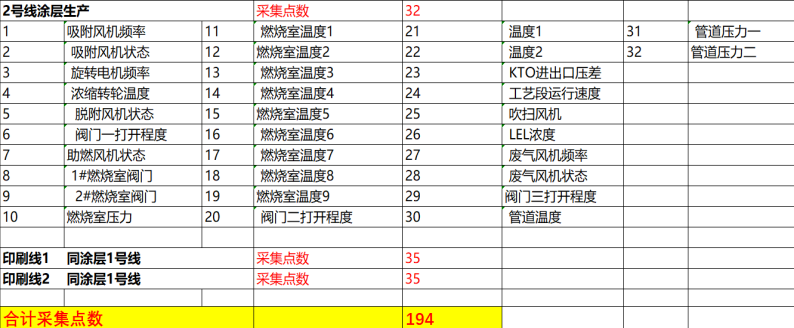
PLC points to be acquired
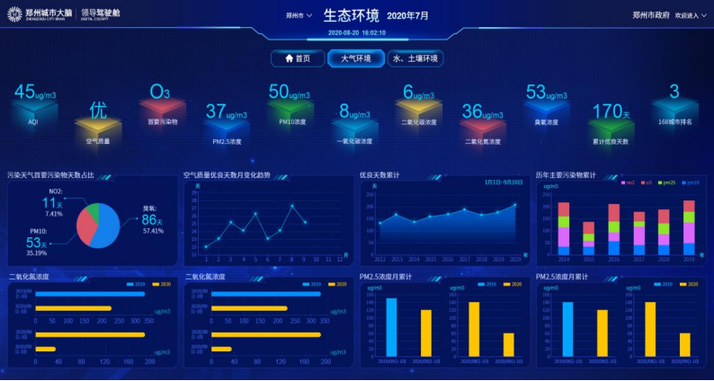
Sample large-screen kanban
3. Implementation Process
- Install the PLC acquisition gateway when the equipment is shut down and powered off.
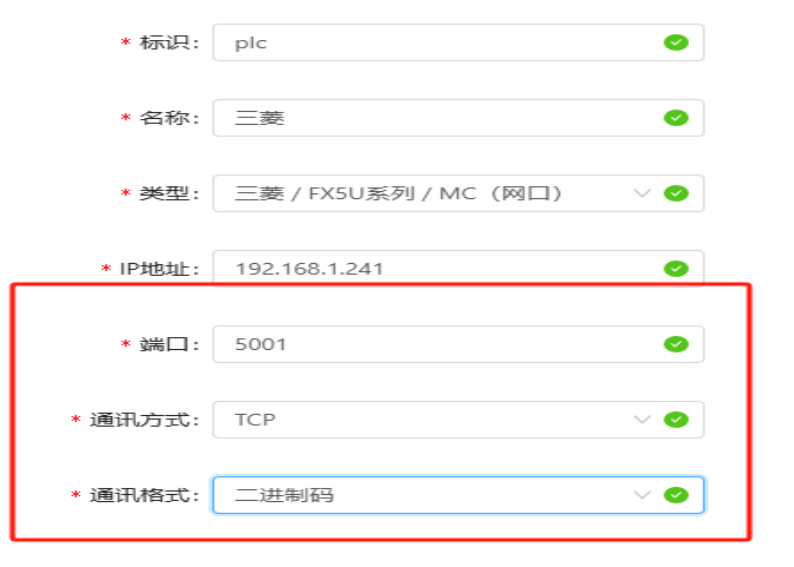
- After installation, open the connectable IP addresses and ports; based on the communication protocol documents we remotely configure the data to be acquired and save it in the database.
- Software development accesses the database for data display and function development.
4. Software Functions After Go-Live
Adding a user: log in as administrator, click User Management in the menu, add a user, select the department and role, enter the user name (login account), with the password defaulting to 123456, then save.
- Login — enter the user name and password to log in; after login the home page appears with a menu bar on the left.
- Home page — click different menu items to switch pages.
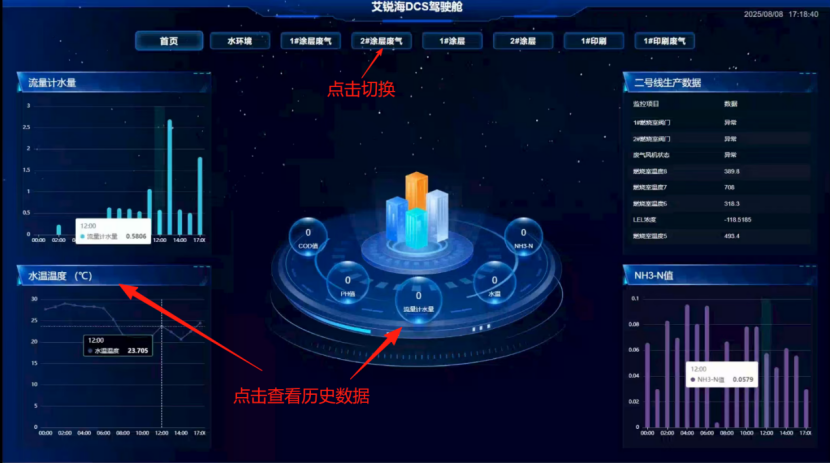
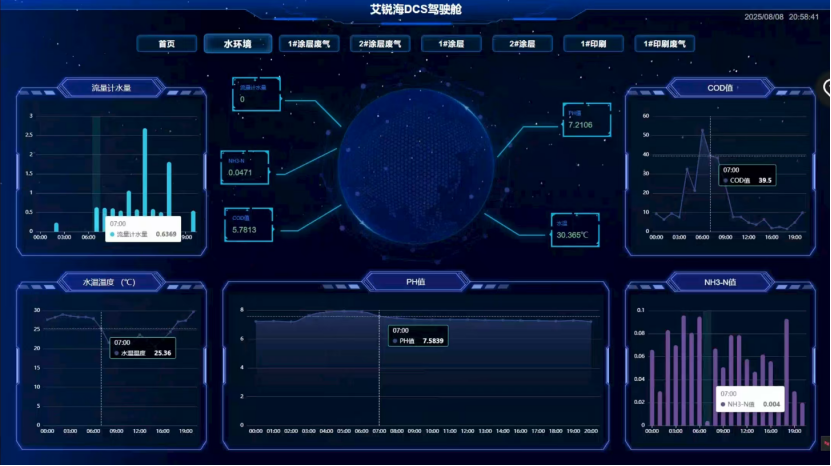
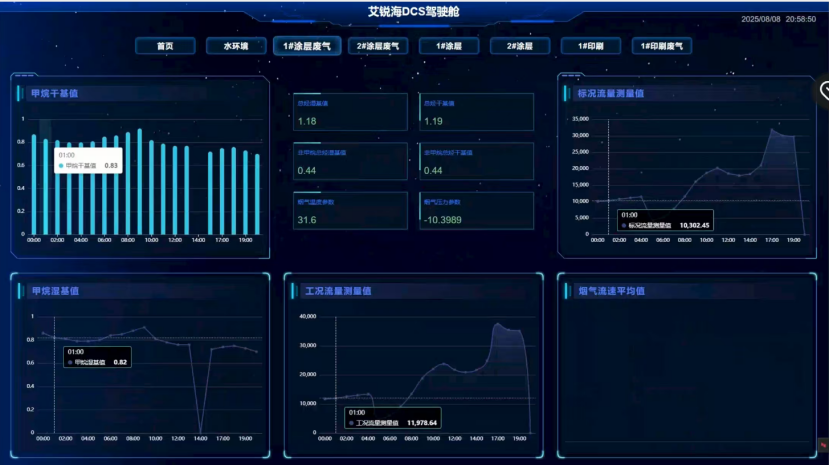
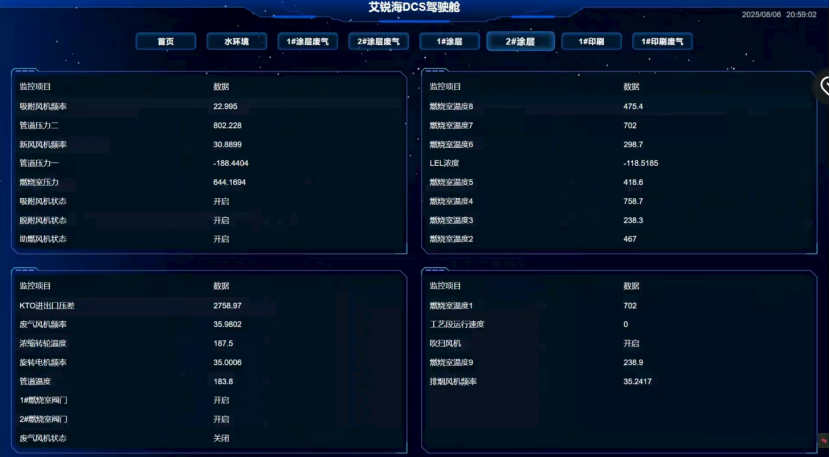
- Large screen — click Data Large Screen to jump to the dashboard page. It includes Home, Water Environment, 1# Coating Waste Gas, 2# Coating Waste Gas, 1# Coating, 2# Coating, 1# Printing and 2# Printing Waste Gas. Click the tabs at the top to switch between data types; click a chart to view the historical data of the related point.
Water environment
1# coating waste gas
2# coating
All dashboard data allow clicking a point to view historical data. History shows one month by default; select a time range to view (ranges over 3 months are not recommended).
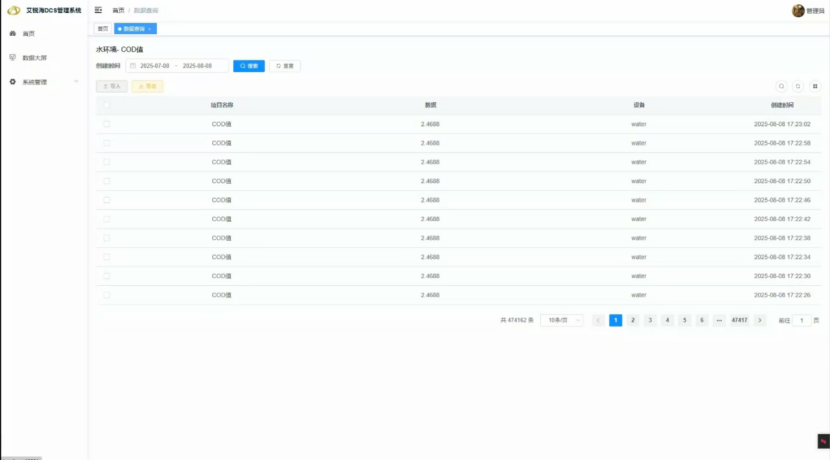
- System Management
4.1 User Management — manages login user information; a blue status means enabled, red means disabled and unable to log in.
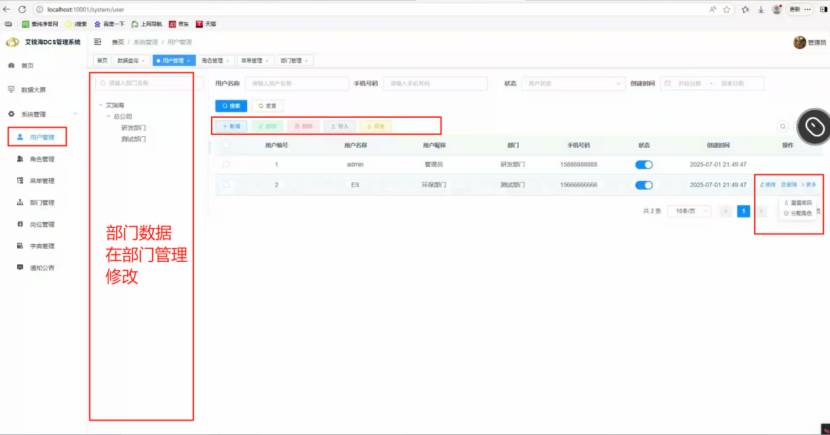
4.1.1 Add user
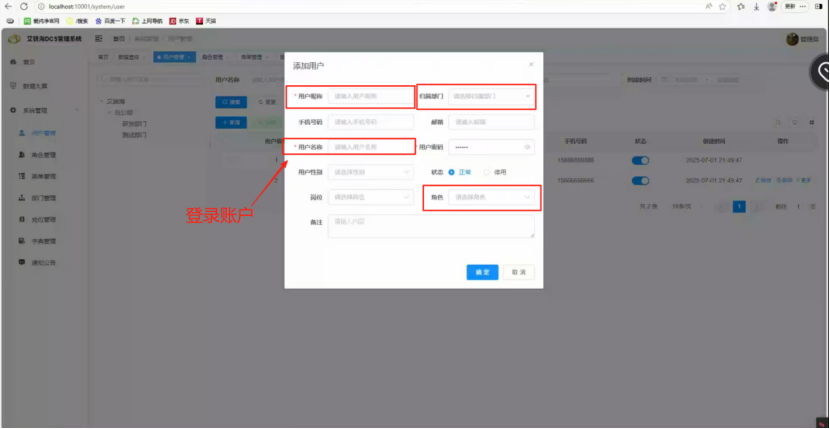
— the user name is the login account, the default password is 123456, and the nickname is shown at the top right; a normal status allows login while disabled forbids it. Roles and departments are recommended when creating users.
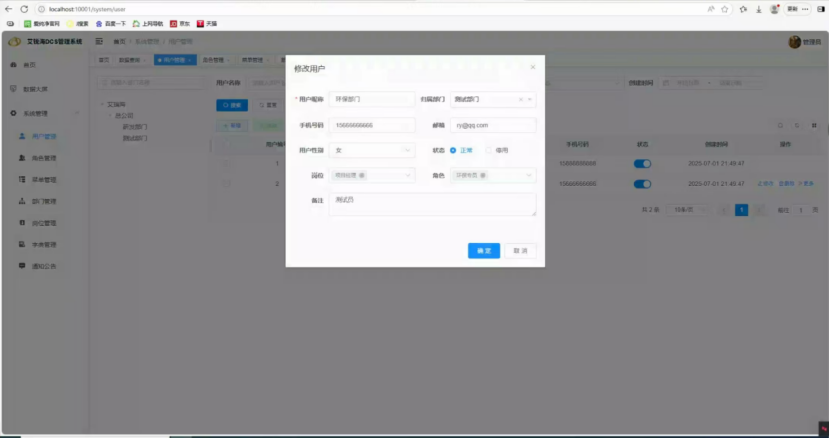
4.1.2 Edit user — click the edit button on the right of the row, or tick the checkbox on the left and click Edit above; in the dialog modify the fields and click OK to save. Status can be changed in the list or here.
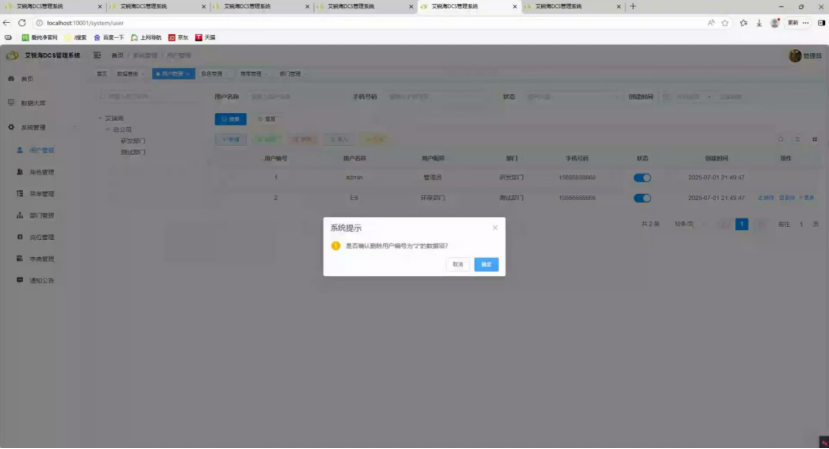
4.1.3 Delete user — click the delete button on the right of the row, or tick the left checkbox and click Delete above, then click OK.
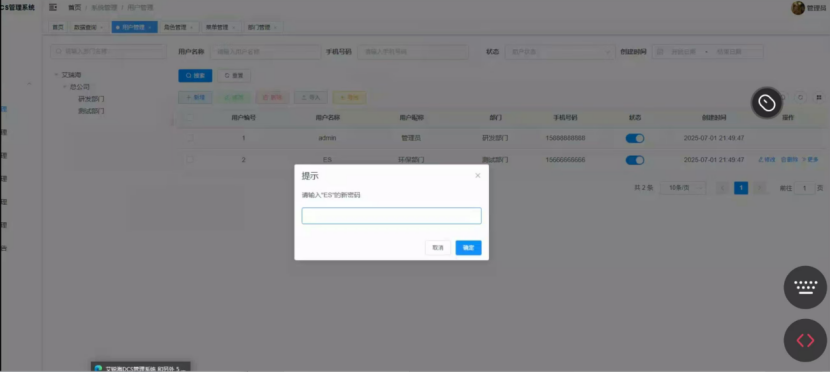
4.1.4 Reset password — click More on the left of the row, then Reset Password, enter the password in the dialog.
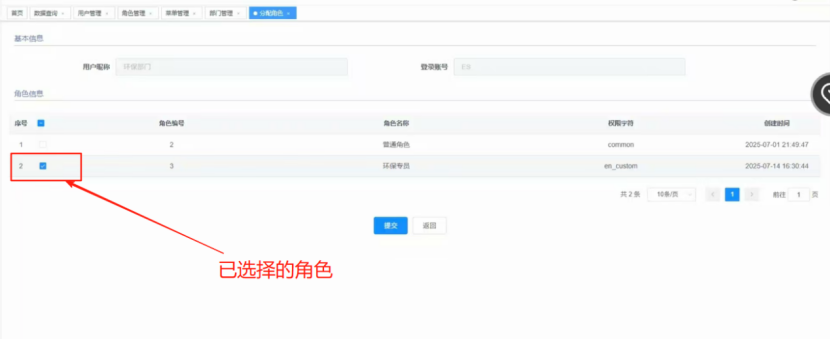
4.1.5 Assign roles — click More, then Assign User to jump to the role assignment page; tick the left checkbox and confirm to submit.
4.1.6 Export — click the Export button above to export basic information of all users.
4.2 Role Management — maintains the roles users hold; different roles see different pages and data. For example, if the current user is an environmental specialist, assign the environmental-specialist role so they can view the data and pages allocated to them. Operations are basically the same as user management.
4.2.1 Add role
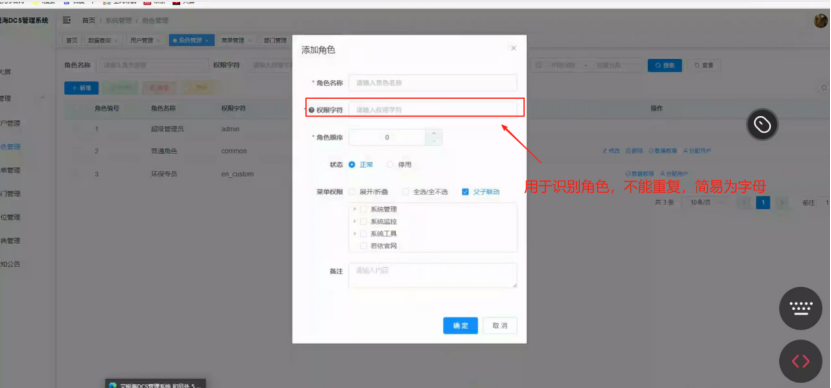
— click Add Role above and fill in the data. The permission string should use letters and must not duplicate other roles. 4.2.2 Edit role
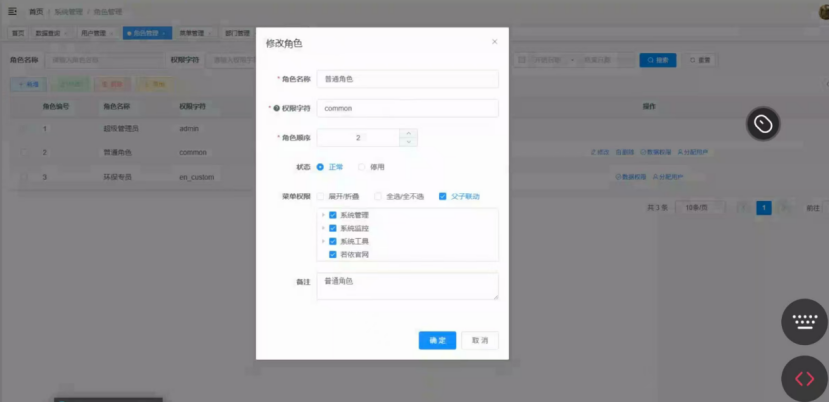
— click Edit and modify as required. The environmental specialist and super administrator cannot be modified. 4.2.3 Delete role
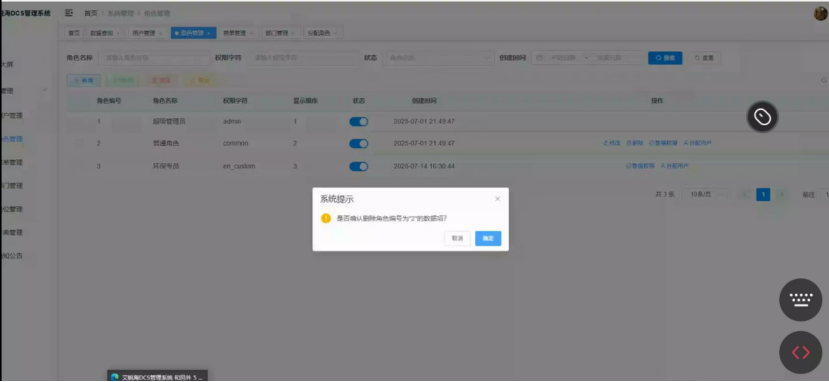
— click Delete, or select multiple via the left checkboxes. If the role still has users, deletion fails with a prompt. 4.2.4 Export roles — click Export to export basic role information. 4.2.5 Assign users
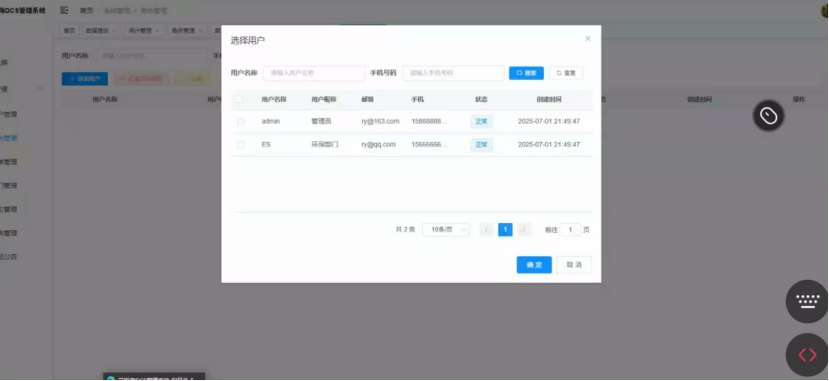
— click Assign User on the right of the row; click Add User to open the dialog. To cancel, tick the left checkbox and click Unauthorize above. 4.2.6 Data permissions — not currently used in this system.
4.3 Department Management — manages the department a user belongs to, making user information easier to manage. Operations are basically the same as above.
4.3.1 Add department
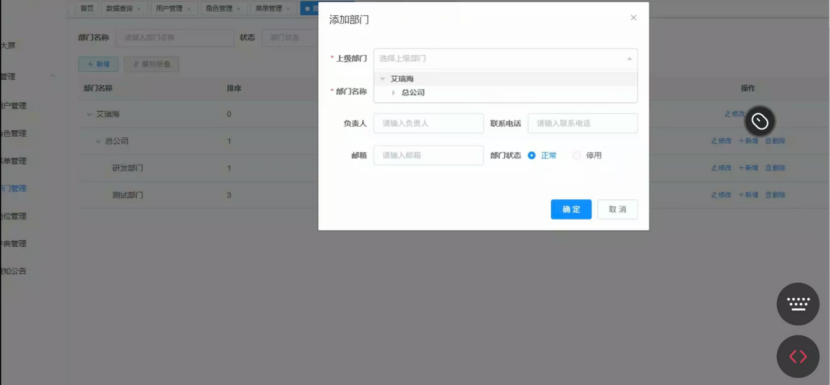
— click Add, select the parent department (tap the triangle on the left to expand; no triangle means no sub-departments) and fill in the other data. Because departments form a tree, clicking the Add button on the right of a row automatically selects the current department as the parent. 4.3.2 Edit department
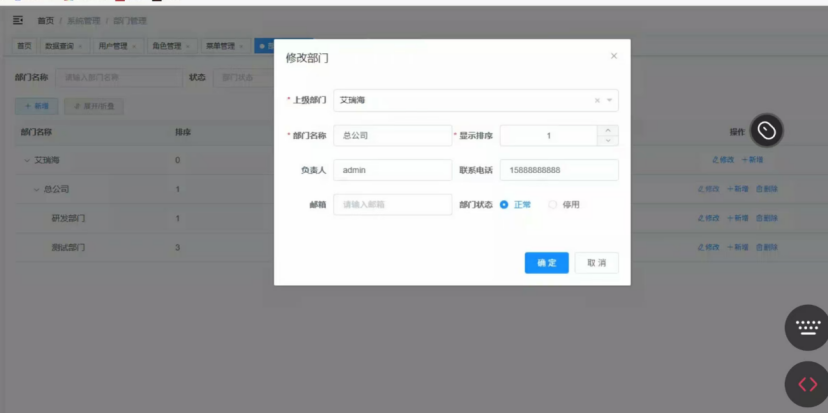
— click Edit and modify the department information, as above. 4.3.3 Delete department — click Delete Department. 4.3.4 Expand/collapse — click Expand/Collapse above to expand or collapse the hierarchy.
4.4 Menu Management — the super administrator adds or deletes menus; do not operate casually. 4.5 Dictionary Management — storage of certain specific fields; do not delete or add.